Your headlights used to cut through the dark like spotlights. Now they glow like candles behind frosted glass — and oncoming drivers flash you because your scattered beams glare everywhere except the road. Yellowed, oxidized headlights aren’t just ugly; the AAA Foundation has found that cloudy headlights can reduce light output dramatically, in some cases cutting effective illumination to a fraction of new. Before you pay $200–$600 per side for replacements, know this: most yellowed headlights can be restored to near-new clarity for under $30 and an hour of your time. Here’s how to do it right — and when restoration isn’t enough.
Why Headlights Turn Yellow
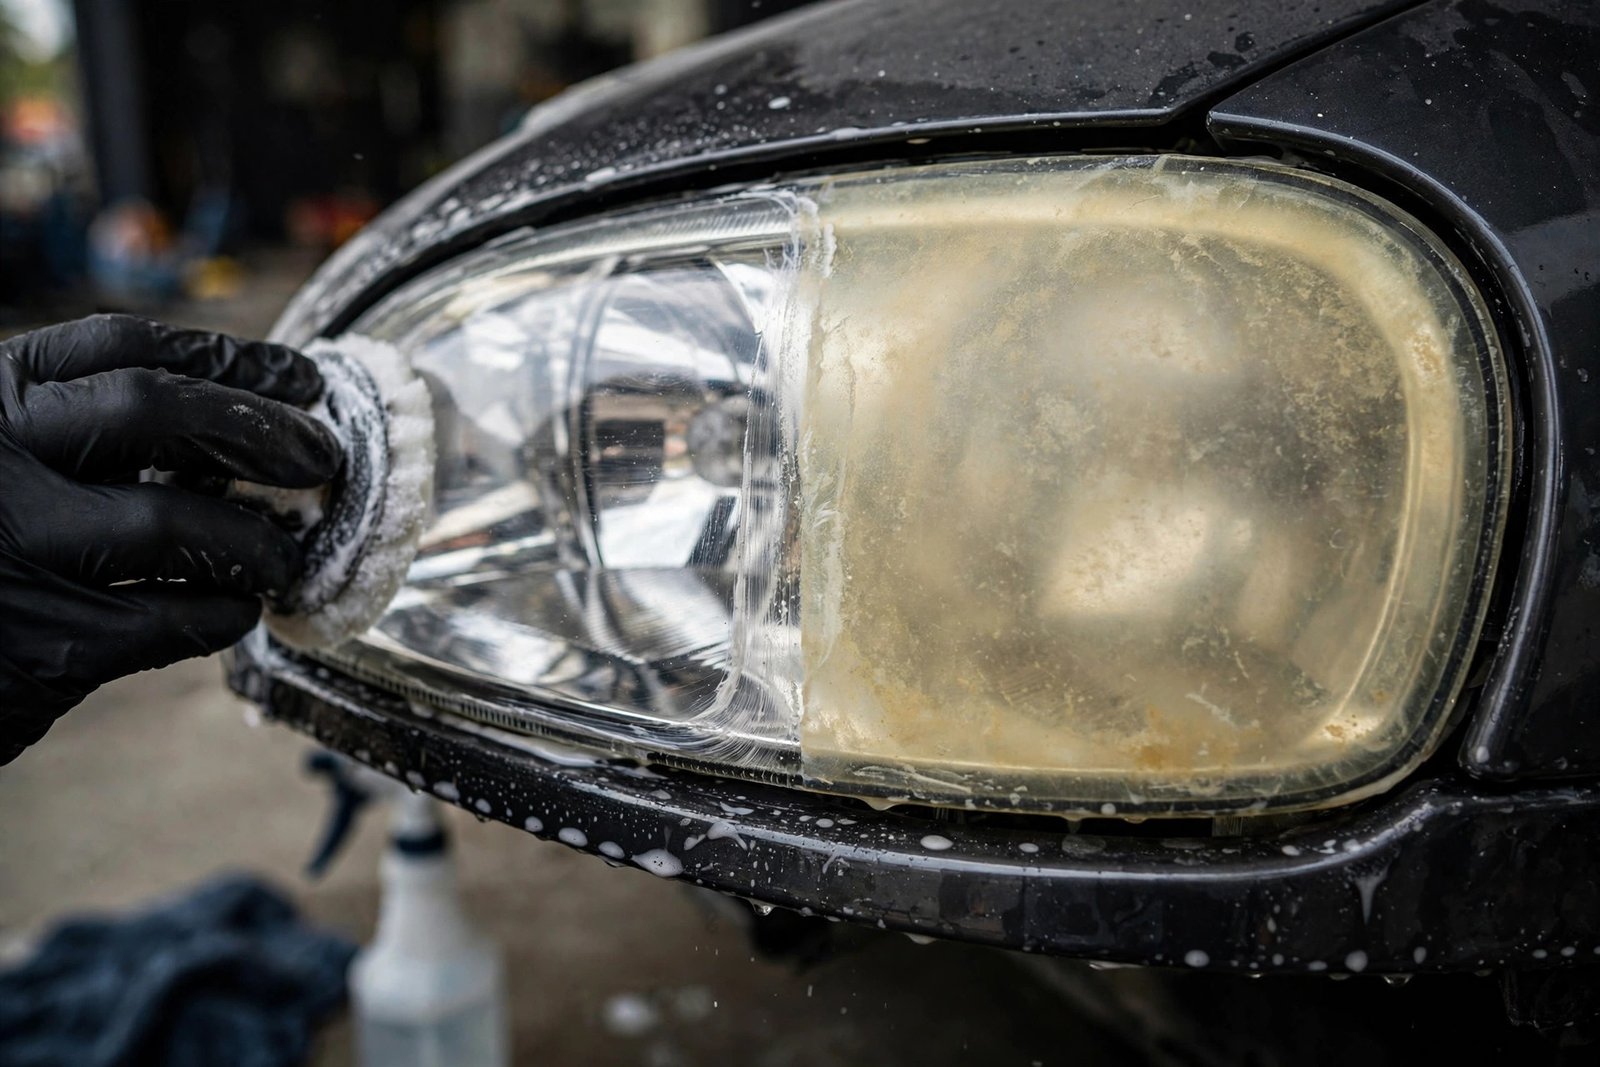
Modern headlight lenses are polycarbonate plastic, coated at the factory with a UV-protective hardcoat. Years of sun exposure break down that coating, and the plastic underneath oxidizes — turning yellow, hazy, and rough. Chicago’s winters accelerate the process: road salt, sand, and freeze-thaw cycles sandblast the lenses, while summer UV does the chemical damage. It’s not dirt; it’s chemistry. That’s why washing doesn’t fix it, and why the problem always returns eventually without proper re-sealing.
Method 1: Headlight Restoration Kit (Recommended)
Consumer restoration kits ($15–$30) from 3M, Meguiar’s, or Sylvania contain everything needed: multiple sandpaper grits, polishing compound, and — critically — a UV sealant. The process:
- Mask aggressively. Tape off paint, trim, and rubber around the headlight with painter’s tape. Sandpaper near clearcoat is unforgiving.
- Wet-sand progressively. Start with the coarsest grit in the kit (often 500–800), sanding in one direction with plenty of water. Then move to finer grits (1000, then 2000–3000), alternating direction each step. The lens will look worse — uniformly frosty — before it looks better. That’s correct.
- Polish. Apply the polishing compound with the included pad or a microfiber cloth, working until clarity returns. A drill attachment speeds this enormously.
- Seal with UV protectant. This is the step everyone skips and the reason restorations “don’t last.” Apply the UV sealant per instructions — it’s the replacement for the factory hardcoat you sanded off. Without it, yellowing returns in months; with it, 1–3 years.
Budget 45–90 minutes for both headlights. Work in shade — direct sun dries compounds too fast. And keep your supplies organized; an organized garage turns this from a chore into a quick Saturday project.
Method 2: The Toothpaste Trick (Temporary Fix)
Whitening toothpaste contains mild abrasives that polish light oxidation. Apply with a damp cloth, rub firmly for several minutes per lens, rinse. It genuinely improves mild haze — and costs nothing. But it provides zero UV protection, so yellowing returns within weeks to months. Think of it as a cosmetic touch-up before selling the car or a road trip, not a restoration. It also can’t fix deep oxidation or pitting.
Method 3: Professional Restoration ($75–$150)
Detail shops and some mechanics offer headlight restoration with professional-grade compounds and machine polishers, often with better sealants than consumer kits. Worth it if your lenses are severely oxidized, if you lack the patience for sanding, or if the car is a lease return where appearance affects charges. Professionals can also handle deeper pitting that DIY kits can’t fully correct.
When Restoration Won’t Work: Replace
Restoration fixes the outside of the lens. Replace the assembly when:
- Moisture inside the lens: Condensation or water pooling inside means the seal has failed. No amount of external polishing fixes internal fogging.
- Cracks or deep pitting: Sandblasted lenses with deep pits won’t polish clear.
- Reflector degradation: If the reflective coating inside has flaked or dulled, light output stays poor regardless of lens clarity.
- Failed bulbs/projectors: Sometimes the problem isn’t the lens at all — dim output with clear lenses points to aging bulbs (halogen output degrades with hours) or failing ballasts.
Replacement costs vary wildly: $75–$200 per side for common models via aftermarket parts, $300–$600+ for OEM assemblies on luxury or newer vehicles. It’s the same value calculation as deciding whether refurbished products are worth it — quality aftermarket often delivers 90 percent of OEM performance for half the price.
Preventing Future Yellowing
- Park in shade or garage when possible — UV is the primary enemy.
- Apply UV sealant annually after restoration, like wax for your headlights.
- Don’t use harsh chemicals on lenses — strong solvents attack the polycarbonate.
- Consider protective film: Clear headlight protection film ($30–$60 DIY) blocks UV and road debris, dramatically extending lens life.
The Safety Case: Don’t Delay
This isn’t cosmetic vanity. The National Highway Traffic Safety Administration data consistently shows nighttime crash risk far exceeds daytime; degraded headlights compound that risk precisely when you need vision most. In Chicago, where winter darkness arrives by 4:30 p.m. and lake-effect snow kills visibility, clear headlights are safety equipment. If your beams look dim and yellow, you’re not just losing style points — you’re losing the reaction distance that prevents crashes.
Illinois Headlight Laws: What’s Actually Required
Illinois law requires headlights from sunset to sunrise and whenever visibility is poor — but there’s a subtler requirement many Chicago drivers miss: state law also mandates headlight use when windshield wipers are in continuous operation. That gray rainy afternoon on the Dan Ryan? Lights on, legally. As for brightness, Illinois prohibits aftermarket HID or LED conversions that blind oncoming traffic — your restored or replacement headlights must meet federal photometric standards. The Illinois Vehicle Code details lighting requirements, and AAA’s headlight research underscores why compliance matters: degraded headlights don’t just risk tickets, they measurably increase nighttime crash risk. After any restoration or replacement, verify aim too — misaimed headlights create glare for others and dark spots for you. Most shops check aim free with other services. Make headlight condition part of your seasonal car check alongside tires and wipers; clear lenses are among the cheapest safety upgrades you can own.
Conclusion
Yellowed headlights are oxidized plastic, not a death sentence: a $15–$30 restoration kit, an hour of wet-sanding and polishing, and a proper UV sealant restores near-new clarity that lasts 1–3 years. Toothpaste buys you weeks; professionals buy you convenience; replacement is for cracked, moisture-filled, or internally degraded assemblies. Do the restoration this weekend — your nighttime visibility, and everyone sharing the road with you, will be measurably safer by Sunday night.
Frequently Asked Questions
How much does it cost to restore yellow headlights?
DIY kits cost $15–$30 and take 1–2 hours. Professional restoration runs $75–$150 for both headlights. Full assembly replacement costs $75–$600+ per side depending on the vehicle and OEM vs. aftermarket parts.
Does toothpaste really clean headlights?
Temporarily, for mild haze — whitening toothpaste’s mild abrasives polish light oxidation. But it offers no UV protection, so yellowing returns within weeks. It’s a stopgap, not a restoration.
How long does headlight restoration last?
With proper UV sealant applied after polishing, 1–3 years. Without sealant, months. Annual UV sealant reapplication and garage parking extend results significantly.
Can I drive with cloudy headlights?
Legally, most states require working headlights meeting brightness standards — severely degraded lights can fail inspection or earn a ticket. More importantly, reduced illumination meaningfully increases nighttime crash risk. Restore them.
Should I replace or restore my headlights?
Restore when the issue is external yellowing/haze on an intact lens. Replace when there’s internal moisture, cracks, deep pitting, or degraded internal reflectors — external polishing can’t fix internal problems.